


Category Archives: Home Improvement
Janitorial Services Vs Commercial Cleaning Services
Business owners understand the impacts of having a clean workspace. A clean environment gives customers a good impression of your business. More so, employees perform extremely better in a properly sanitized workspace. Cleanliness is also more likely to have an effect on your down line. Businesses that fail to keep their workplace clean will realize their mistake the hard way when they start losing customers. Commercial cleaning services Avondale Arizona caters to this need. A clean and comfortable work environment is just the right ingredient that helps boost worker’s productivity level and increase revenue.
While some businesses hire an in-house cleaning crew to perform the cleaning tasks, others would outsource to a third party that provides janitorial or commercial cleaning services Avondale Arizona.
Many people use these phrases, janitorial services, and commercial services interchangeably, which is so wrong. Each term describes a unique cleaning service. So if you are considering outsourcing your business cleaning project to a third party, you should understand the difference between these two types of services.
Difference Between Janitorial Services and Commercial Cleaning
While janitorial services handle smaller, everyday cleaning tasks, commercial cleaning services manage a significant cleaning task that takes place at least twice a year. For instance, janitorial services specialize in carpeting vacuuming while commercial cleaning services include window cleaning on skyscrapers. Commercial cleaning services Avondale Arizona come in handy if you are looking for a deep cleaning expert or need to put your office space in great shape for a one-of-a-kind upcoming event. Janitorial services, on the other hand, are specialists in everyday cleaning and maintenance.
Janitorial Services
Looking for cleaners that will keep your office space clean and well maintained on a daily basis? Look no further than a janitorial service provider. Your facility will look sparkling clean and ready to welcome visitors and clients. Janitorial services work in line with the company’s specific requirements. Professionals in this field use the right cleaning product to keep your facility sparkling and clean. Some of the services offered include
- Vacuum cleaning
- Waste management
- Restroom cleaning
- Office kitchen cleaning
- General office cleaning
Commercial Cleaning Services
For a bigger cleaning task, commercial cleaning services Avondale Arizona has got you covered. This is not the regular type of cleaning. Most companies opt for the services of commercial cleaners to handle a one-time job. As a company, bigger cleaning jobs should not be handled by janitorial service providers because the end result might be discouraging. Commercial cleaners know how important it is to handle bigger cleaning projects. Also, the task will be executed just as requested and to your taste. Since it’s a bigger project that requires a large fund, then you might want to consider doing proper research before hiring them. Services offered include
- Hard surface floor cleaning
- Deep carpet cleaning
- Window washing
- Car park cleaning
Now, you know the difference between janitorial services and commercial cleaning. Evaluate the cleaning task at hand before hiring one.
Homeless Camps and Its Health Threats
Homeless camp cleanup Asheville NC is a top priority today. Many states across the US including North Carolina are struggling with the issue of homelessness. The high rate of homelessness in the state is a major concern for all. Many people who fall into the homeless category live in encampments scattered about in residential areas and public spaces in Asheville, North Carolina.
Homeless camps can be sited in many different locations including under freeway overpasses and city parks. Though there are sanctioned areas, most of the temporary homes are sited illegally. Once the site gets reported, the city will evaluate the area to determine the right remediation method to adopt. Kindly note, whether encampments are sited on private or public property, remediation should be the sole responsibility of homeless camp cleanup experts. These technicians will clear the garbage and perform a thorough clean-up job.
Biohazards Found in Homeless Camps
Homeless camps cleanup isn’t an easy task. Technicians who undertake the cleanup are prepared for the tasks that lie ahead. Encampments are mostly riddled with trash, human waste, sharps, rotting food, and lots more. Handling these items without protective equipment can be dangerous to your health. These sites pose a substantial risk of exposure to biological matters that contain harmful blood pathogens. In addition to contracting these diseases, there is also a high possibility of cross-contamination. To prevent this, a professional cleanup technician should handle the job. Common biohazards associated with homeless camps include
- Blood-borne pathogens – HIV, Hepatitis and MRSA
- Bodily waste and matter including urine, feces, and vomit
- Human waste
- Animal waste
- garbage
- Rodent infestation
- Drug paraphernalia namely syringes and needles
Encampments pose a high risk to the health of the unsheltered, housed residents and the general public. That’s why the city has no other option than to shut them down. However, there are a few encampments that take pride in cleanliness and proper waste management. In this kind of situation, it is hard to find criminals or people who exhibit violent behaviors in such camps. Also, they pose little or no health risk to the general public. This is a typical example of a properly managed homeless camp sited legally.
In the case of an unmanaged camp, it will be pulled down. Once the city gets notified of the illegal homeless camps, they swing into action immediately. their team of specialists visits and evaluates the site. The site will be posted and the unsheltered given a 72 hours notice to evacuate the premises. Once the time is up, experts in homeless camp cleanup Asheville NC storm the site with their advanced cleaning tools and equipment.
The technicians have garnered many years of experience in the field and are quite knowledgeable on how to handle the biological matters found at the site. With these professional technicians handling the cleaning project, rest assured that the project will be completed right on time.
Qualities to Look Out for When Hiring Homeless Camp Cleanup Contractors
Homeless camps are becoming the norm in recent times. In many communities, these camps exist unnoticed for a long time, until someone realizes they’re present. These camps are for the most part unhealthy. When property owners find out about these illegal sites, they swing into action to get rid of these camps immediately. At this stage, the property owner is likely to reach out to professional homeless camp cleanup contractors to have the site disbanded.
While searching for a professional company to clean up the site, picking the right candidate can be a hurdle. Here are a few things to help you.
Compassion
Despite posting the camp and asking active campers to evacuate within a given period, there may be a few campers who are a bit hesitant to leave. If this is the case, the contractor will help collect all of their valuables and provide a listing of local shelters that may suit them. The primary objective is to provide assistance no matter how little to those who end up living on the streets due to joblessness, medical issues, and other unfortunate events.
The property owner gets real-time update on the cleaning process and when it is scheduled for. They interact with anyone who remains at the camp cordially and professionally. A homeless cam cleanup contractor is compassionate and professional when handling homeless camp restoration jobs.
Using the Right Tools and Equipment
To get the most out of a homeless camp cleanup, technicians need the right supplies, equipment, and resources. Some of these supplies may be the same solution used for other restoration projects such as disaster cleanup, crime scene cleanup, and odor removal. A few other resources may be unique to homeless camp cleanup.
Homeless camp cleanup contractors will decide the right supplies and equipment unique that befits a particular setting right after carrying out a proper assessment of the site. Using the right resources prevents any sort of delay and allows for efficient use of time.
Using Protective Equipment
Homeless camps aren’t devoid of biological hazards. From human waste and sharps to items soaked in different types of bodily fluids, it is essential to limit the risk of exposure to a large extent. To guarantee their protection while working on your site, it is not uncommon for these professional cleaning contractors to use protective equipment. One such protective equipment is the hazmat suit which protects the cleaner from head to toe. Others include hand gloves, goggles, face masks, and many more.
Pay Close Attention to Detail
Homeless camp cleanups can be a difficult task to tackle. While some of the work can be easily seen, how do you manage the parts that require closer scrutiny to detect? Hiring professional homeless camp cleanup contractors to ease off the stress as they know just where to look and deliver outstandingly.
Remember, do not attempt homeless camp cleanup without professional help. Reach out to expert cleaning companies today.
Issues That Prompt Homeless Camp Cleanup
Homelessness is a large and complex issue. Hundreds of thousands of people live on the streets due to several reasons. In the same vein, several thousand are on the verge of becoming homeless. Many people can’t afford to rent accommodation due to the high rents, hence the increased number of homeless people on the streets. Ill-managed mental health system, drug abuse, and job loss, are other leading factors for this rise. Homeless people tend to set up encampments that serve as shelters in strategic spots across the city. Many communities are seeking solutions on how to get rid of these problems by creating more affordable homes and temporary living spaces. There are many strategies to address these issues but none will succeed alone. Homeless camp cleanup experts clean and sanitize the evacuated illegal sites to prevent cross-contamination.
When Do You Need Homeless Camp Cleanup
Residents at homeless camps put their lives at risk. These sites lack basic amenities. No access to water, poor waste management, inadequate sanitation service, and many more puts the residents at risk of getting infected. It is not hard to see why many of these residents fall sick due to poor hygienic conditions.
However, there are a few legal camps within these communities. Leaving these camps unmanaged encourages the spread of disease which in most cases can lead to an endemic. Even though legal encampments are equipped with regularly serviced dumpsters and porta-potties onsite, odds are high that the camp will experience a proliferation of animal and human waste, trash, and other biological matters resulting in camp closure.
It is barbaric and inhumane to allow people to live on these sites. Moreover, it is impossible to restore these sites without evacuating the people who live there. Depending on the type of property, this service is the responsibility of the property owner. For public spaces, the city takes responsibility. Private property owners oversee the cleaning and sanitization of encampments on their property. The good news is that there are experts who specialize in homeless camp cleanup. The city reaches out to them when they need to close and decontaminate an unmanaged encampment arises. So, you should follow suit. It is not a service that should be carried out by untrained personnel due to the high risks of exposure to potential hazards. While people living in homeless camps are mostly law-abiding citizens, it attracts negative neighbors who engage in criminal activity. You should act fast.
Once you discover an encampment within your community, be sure to notify the city or property owner. The city, for instance, will send out field coordinators to visit and assess the reported sites. If they find evidence of an encampment, the staff will take note of the health conditions and features of the site. Once documentation is complete, the next big step is to contact a professional homeless camp cleanup company to remediate the site using unique cleaning tools and resources. These experts will get rid of excessive garbage, rodents, human waste, and other biohazardous materials found onsite.
How a Solar Panel Installer Can Help You Choose the Right System
 Opting to install a solar energy system is one more way you’re seeking to live a lifestyle that’s friendlier to the environment. The thing is that you’re not sure what needs to be part of the system or even which one you should choose. This is where help from a solar panel installer will make a difference. Among other types of support, the right installation service can help you with the following.
Determining the Number of Panels to Include
How many solar panels would be right for your property? While you could venture a guess, why use that method? A better approach is to invite a professional to visit the property and talk a bit about what you have in mind.
Based on the information you supply and the answers to the questions asked by the professional, it’s possible to come up with suggestions of how to configure the solar energy array. That includes how many panels would work best in your case.
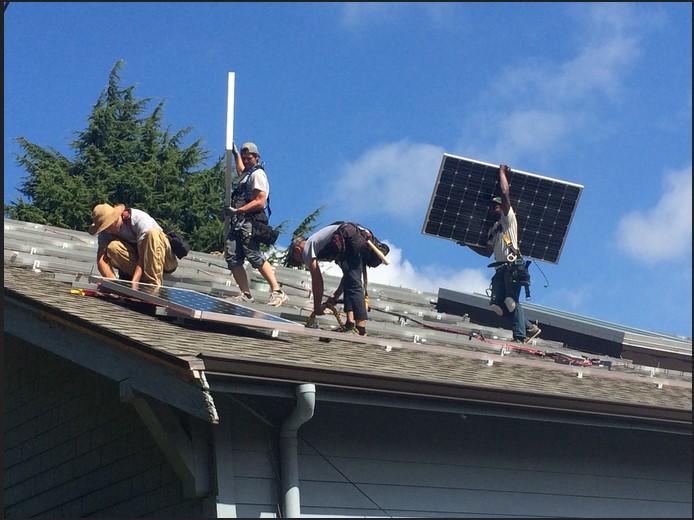
Settling on the Best Location
Solar panels can be set up in more than one area. Which one would work best for you? A professional can assess the property and make suggestions about what to do and enjoy the way things are set up for a long time.
It may be that mounting the panels on the roof is the right approach for your property. Maybe mounting them on a secondary building would work out. It may even be that they need to be placed on a framework made specifically to support them. By the end of the assessment, you’ll know the pros and cons associated with each choice.
Understanding How to Utilize the System as Primary or Secondary Source of Power
Do you plan on making solar energy the primary source of power for the property? Perhaps it’s intended to use solar energy for specific functions, like operating specific appliances. Maybe the idea is to use solar energy as a backup resource when the power grid is inoperable for a time.
Whatever the plan, you can bet that a professional with the solar panel installer can provide ideas on how to structure the array so it fulfills the intended purpose. That will include making sure you know how to operate the system in the event of a power failure, or what to check if the power supply from the array should be interrupted.
Explaining the Importance of Maintenance and Upkeep
Part of the support you receive has to do with the general upkeep of the solar energy system. Like any other source of power, it’s important to have the components checked by a professional from time to time. This makes it possible to identify any minor issues and correct them before there’s the opportunity for serious problems to develop.
The installer can provide ideas on what sort of checks and maintenance you can do on your own. There’s also the matter of setting up a maintenance schedule with the use of a service contract. You can bet that it will be worth every penny.
If you have questions about solar energy and how to select the right system, call today. There’s a good chance that the system can be in place a lot faster than you anticipated.