


Monthly Archives: September 2023
Shrinking Artistry: Creating Decorative Shrinky Dink Paper Crafts
shrinky dink paper crafts are a fun and creative way to make unique and decorative items. With shrinky dink paper, you can create jewelry, keychains, magnets, and more. It’s a great way to express your creativity and make something special for yourself or a loved one. With a few simple supplies and a bit of imagination, you can create beautiful and unique pieces of art. shrinky dink paper crafts are a great way to get creative and make something special.
How to Create Unique and Colorful Shrinky Dink Paper Crafts
shrinky dink paper crafts are a fun and creative way to make unique and colorful decorations for your home or office. With a few simple supplies, you can create beautiful and eye-catching pieces of art that will last for years. Here is a step-by-step guide to creating your own shrinky dink paper crafts.
Step 1: Gather Your Supplies
To get started, you will need to gather the necessary supplies. You will need a package of shrinky dink paper, a pair of scissors, a pencil, a ruler, a hole punch, and a baking sheet. You will also need a few other items such as markers, colored pencils, glitter, and other decorative items.
Step 2: Draw Your Design
Once you have all of your supplies, you can begin to draw your design. Use the ruler and pencil to draw the shape you want your Shrinky Dink to be. You can also use the hole punch to create any holes or cutouts you want in your design.
Step 3: Color Your Design
Once you have your design drawn, you can begin to color it. Use markers, colored pencils, glitter, and other decorative items to make your design as unique and colorful as you want.
Step 4: Cut Out Your Design
Once you have finished coloring your design, you can cut it out. Use the scissors to carefully cut out the shape you have drawn.
Step 5: Bake Your Design
Once you have cut out your design, you can place it on a baking sheet. Place the baking sheet in the oven and bake your design according to the instructions on the package of shrinky dink paper.
Step 6: Enjoy Your Creation
Once your design has finished baking, you can take it out of the oven and let it cool. Once it has cooled, you can enjoy your unique and colorful shrinky dink paper craft.
Creating shrinky dink paper crafts is a fun and creative way to make unique and colorful decorations for your home or office. With a few simple supplies and a bit of creativity, you can create beautiful and eye-catching pieces of art that will last for years.
Exploring the Creative Possibilities of Shrinky Dink Paper Artistry
shrinky dink paper artistry is a unique and creative way to express yourself through art. It is a simple and fun craft that can be enjoyed by people of all ages. With just a few simple supplies, you can create beautiful and unique pieces of art that will last for years to come.
shrinky dink paper is a special type of plastic that shrinks when heated. It comes in a variety of colors and sizes, and can be used to create a wide range of art projects. The most common way to use shrinky dink paper is to draw or trace a design onto the plastic, then cut it out and bake it in the oven. As the plastic shrinks, the design will become smaller and more detailed.
Once the plastic has cooled, it can be used to create a variety of art projects. You can use it to make jewelry, keychains, magnets, ornaments, and more. You can also use it to make custom cards, scrapbook pages, and other paper crafts. The possibilities are endless!
shrinky dink paper artistry is a great way to express your creativity and make something unique and special. With just a few simple supplies, you can create beautiful and unique pieces of art that will last for years to come. So grab some shrinky dink paper and get creative!
Conclusion
shrinky dink paper crafts are a fun and creative way to make unique and decorative pieces of art. With a few simple supplies, you can create beautiful and unique pieces of art that can be used to decorate your home or given as gifts. With a little bit of practice, you can create amazing pieces of art that will last for years to come. shrinky dink paper crafts are a great way to express your creativity and make something special.
4-Day Iceland Itinerary: Discovering the Land of Fire and Ice
Welcome to Iceland, the land of fire and ice! This 4-day itinerary will take you on a journey of discovery through the stunning landscapes of this unique country. From the capital city of Reykjavik to the majestic glaciers of the south, you will experience the best of Iceland’s natural beauty. Along the way, you will have the opportunity to explore the country’s vibrant culture, sample its delicious cuisine, and take part in exciting activities. So, get ready to explore the wonders of Iceland and create memories that will last a lifetime!
Exploring Iceland’s Natural Wonders: A 4-Day Itinerary
Day 1:
Begin your exploration of Iceland’s natural wonders with a visit to the iconic Gullfoss Waterfall. Located in the Hvítá River canyon, this stunning waterfall is one of the most popular attractions in the country. After taking in the breathtaking views, continue your journey to the Geysir Geothermal Area. Here, you can witness the powerful Strokkur geyser erupting every few minutes.
Day 2:
On day two, head to the Snaefellsnes Peninsula. This area is home to some of Iceland’s most stunning landscapes, including the Snaefellsjökull Glacier and the Lóndrangar Cliffs. Take a hike along the coastline and explore the many caves and lava formations.
Day 3:
On day three, explore the Jökulsárlón Glacier Lagoon. This stunning glacial lake is home to a variety of icebergs and is a great spot for wildlife watching. Afterward, take a boat tour of the lagoon and get up close and personal with the icebergs.
Day 4:
On your final day, visit the Thingvellir National Park. This UNESCO World Heritage Site is home to a variety of geological wonders, including the Silfra Fissure, which is a rift between the North American and Eurasian tectonic plates. After exploring the park, take a dip in the nearby hot springs and relax in the warm waters.
By following this 4-day itinerary, you will be able to experience some of Iceland’s most spectacular natural wonders. From powerful waterfalls to stunning glaciers, you will be sure to have an unforgettable experience.
Uncovering the Magic of Iceland: A 4-Day Itinerary
Day 1: Reykjavik
Welcome to Iceland! Start your journey in the capital city of Reykjavik. This vibrant city is full of culture, history, and natural beauty. Spend the day exploring the city’s many attractions, including the iconic Hallgrímskirkja church, the National Museum of Iceland, and the Harpa Concert Hall. Take a stroll along the waterfront and enjoy the stunning views of the harbor. In the evening, take a dip in one of the city’s many geothermal pools.
Day 2: Golden Circle
Today, embark on a tour of the Golden Circle. This popular route takes you to some of Iceland’s most iconic sites, including the Gullfoss waterfall, the Geysir geothermal area, and Thingvellir National Park. Along the way, you’ll have the chance to witness the stunning landscapes of the Icelandic countryside.
Day 3: South Coast
Today, head south to explore the stunning coastline of the South Coast. This area is home to some of Iceland’s most breathtaking scenery, including the black sand beaches of Reynisfjara and the majestic glaciers of Vatnajökull National Park. Don’t forget to take a boat tour of the Jökulsárlón glacier lagoon to witness the incredible ice formations up close.
Day 4: Blue Lagoon
On your final day in Iceland, relax and unwind at the Blue Lagoon. This geothermal spa is one of the country’s most popular attractions, and it’s easy to see why. Enjoy a soak in the warm, mineral-rich waters and take in the stunning views of the surrounding landscape.
We hope you’ve enjoyed your time in Iceland! From the vibrant city of Reykjavik to the stunning landscapes of the South Coast, this country has something for everyone. We hope you’ve been inspired to explore more of this magical land.
Conclusion
The 4-day Iceland itinerary is a great way to experience the best of Iceland’s natural beauty and culture. From the stunning glaciers and waterfalls of the south to the geothermal pools of the north, you’ll be able to explore the country’s diverse landscapes and get a taste of its unique culture. Whether you’re looking for a relaxing getaway or an adventure-filled holiday, this itinerary will provide you with an unforgettable experience.
Laundry Revival: Completing a Laundry Room Makeover for Efficiency
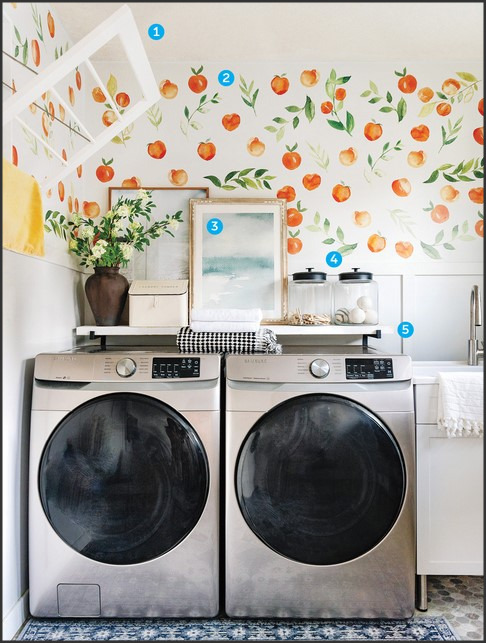
Source: chatelaine.com
Welcome to Laundry Revival! We are here to help you create a laundry room makeover that is both efficient and stylish. Whether you are looking to upgrade your existing laundry room or create a brand new one, we have the tools and resources to help you get the job done. Our team of experienced professionals will work with you to design a space that meets your needs and fits your budget. We will help you select the right appliances, storage solutions, and accessories to make your laundry room more efficient and enjoyable. With our help, you can create a laundry room that is both functional and beautiful.
How to Maximize Efficiency with a Laundry Room Makeover
A laundry room makeover can be a great way to maximize efficiency and make the chore of doing laundry more enjoyable. With a few simple changes, you can create a space that is both functional and aesthetically pleasing. Here are some tips to help you get started.
First, consider the layout of your laundry room. If you have a small space, look for ways to maximize storage and organization. Install shelves and cabinets to store detergents, fabric softeners, and other laundry supplies. Hang a drying rack from the ceiling to save floor space. If you have a larger space, consider adding a countertop for folding clothes and a sink for pre-treating stains.
Next, think about the lighting in your laundry room. Natural light is ideal, but if that’s not an option, consider installing bright overhead lighting. This will make it easier to see what you’re doing and make the space feel more inviting.
Finally, add some personal touches to make the space your own. Hang artwork or photos on the walls, add a rug or throw pillows to the floor, and choose a color palette that reflects your style.
With a few simple changes, you can transform your laundry room into an efficient and inviting space. With a little bit of planning and creativity, you can make doing laundry a more enjoyable experience.
Tips for Creating a Functional and Stylish Laundry Room with a Makeover
1. Choose a Color Scheme: When giving your laundry room a makeover, it is important to choose a color scheme that will make the room look stylish and inviting. Consider colors that will complement the rest of your home, such as neutrals, pastels, or bold hues.
2. Utilize Wall Space: Make the most of your laundry room by utilizing wall space. Install shelves and cabinets to store detergents, fabric softeners, and other laundry supplies. This will help keep the room organized and clutter-free.
3. Add a Folding Table: A folding table is a great addition to any laundry room. It provides a convenient place to fold clothes and can also be used for other tasks, such as ironing.
4. Install a Hanging Rack: A hanging rack is a great way to save space and keep clothes organized. Hang items that need to be air-dried, such as delicates or swimsuits.
5. Add a Rug: A rug can add a touch of style and comfort to your laundry room. Choose a rug that is durable and easy to clean.
6. Install a Countertop: A countertop is a great way to add extra workspace to your laundry room. It can be used for folding clothes, sorting laundry, or other tasks.
7. Add Decorative Touches: Add some decorative touches to your laundry room to make it look more inviting. Hang artwork, add a few plants, or display a few decorative items.
8. Install a Sink: A sink is a great addition to any laundry room. It can be used for hand-washing delicate items or for pre-treating stains.
9. Add Lighting: Good lighting is essential for any laundry room. Install bright overhead lighting and task lighting to make the room more functional.
10. Install a Drying Rack: A drying rack is a great way to save energy and money. Hang items that need to be air-dried, such as delicates or swimsuits.
Conclusion
The laundry room makeover for Efficiency project was a great success. Not only did it make the laundry room more efficient, but it also made it more aesthetically pleasing. The new storage solutions, improved lighting, and updated appliances all worked together to create a more efficient and organized space. The project was a great way to make the most of the laundry room and create a more enjoyable experience for everyone. With the help of Laundry Revival, the laundry room makeover was a success and will be enjoyed for years to come.