


Category Archives: Home Improvement
DIY Trellis Structures: Enhance Your Garden with Vertical Gardens

Source:https://www.thepaintedhinge.com
Vertical gardening has become one of the most popular trends in modern landscaping, especially for those looking to maximize limited space. If you’re trying to add more greenery to a small backyard or elevate the aesthetic of your outdoor area, DIY trellis structures are an excellent way to introduce vertical elements that are both functional and beautiful. These structures can support climbing plants, vines, and flowers, turning any garden into a lush, green oasis. In this article, we’ll explore the benefits of building your own trellis structures, provide step-by-step guidance on how to create them, and suggest ways to incorporate them into your garden design. Whether you’re a seasoned gardener or a beginner, DIY trellis structures can add a unique and personal touch to your landscape.
The Benefits of DIY Trellis Structures in Your Garden
Creating your own DIY trellis structures offers numerous advantages, both in terms of aesthetics and practicality. Not only do trellises make great plant supports, but they can also serve as attractive focal points in the garden, adding height, dimension, and visual interest.
1. Maximizing Space
One of the most significant advantages of vertical gardens is that they help you make the most of limited space. Many plants, especially climbing vegetables like peas, cucumbers, or tomatoes, or flowering vines such as clematis and morning glories, naturally grow upwards. With a DIY trellis structure, you can give these plants the support they need while freeing up valuable ground space for other plants. This is especially useful in smaller gardens, urban spaces, or patios, where space for traditional garden beds is limited.
A vertical garden also allows you to create layers of greenery. Instead of having all plants spread horizontally, you can stack them in tiers, with trellises allowing different plant types to grow vertically. This helps to optimize sunlight exposure and air circulation for each plant, contributing to healthier growth and more abundant harvests.
2. Aesthetic Appeal
DIY trellis structures can also significantly enhance the overall aesthetics of your garden. They act as living sculptures, providing structure and focal points that elevate the beauty of your space. When covered in climbing plants and flowers, a trellis can transform a simple garden into an enchanting space. Imagine walking through your garden with vibrant flowers cascading from trellises, or a fragrant vine wrapping around the structure, creating a delightful sensory experience.
The variety of materials and designs available for trellises means you can customize them to suit any garden style. Whether you prefer a rustic, wood-paneled design or a sleek, metal contemporary structure, DIY trellises can be tailored to match your personal style and the overall aesthetic of your garden.
3. Plant Health and Growth
Trellises do more than just provide a climbing surface—they can also improve the health of your plants. By elevating vines and climbing plants off the ground, DIY trellis structures help reduce the risk of disease and pest infestations, as plants are less likely to come into contact with the soil. The improved air circulation around the plants can also reduce fungal infections and promote healthier growth.
Additionally, trellises can prevent plants from sprawling or becoming too tangled, which can hinder their ability to absorb sunlight and water. Climbing plants that are properly supported by a trellis tend to grow more vigorously, and their fruits or flowers are easier to harvest or enjoy.
Building Your Own DIY Trellis Structure
Now that we’ve explored the benefits of adding DIY trellis structures to your garden, let’s dive into how you can build your own. Whether you’re an experienced DIY enthusiast or just starting, creating a trellis is a simple and rewarding project.
1. Choose the Right Materials
The first step in building your own trellis is selecting the right materials. The most common materials for trellises include:
- Wood: Wood is a classic option that blends well with most garden styles. Pressure-treated lumber, cedar, or redwood are durable options that can withstand outdoor conditions. Wood is easy to work with, making it a good choice for beginners.
- Metal: If you prefer a more industrial or contemporary look, metal trellises are an excellent choice. Wrought iron, steel, and galvanized metal provide a sturdy frame that can support heavy vines and plants.
- PVC: For a more lightweight option, PVC pipe is affordable, easy to handle, and resistant to weathering. It can be painted to match your garden’s theme and is perfect for small or temporary trellis structures.
- Bamboo: Bamboo is a sustainable, lightweight option that adds a natural, tropical feel to your garden. It is also strong and flexible, making it ideal for trellis projects.
The choice of material will depend on your garden’s aesthetic, the plants you plan to grow, and how long you expect the trellis to last.
2. Design Your Trellis
Before you start constructing, think about the design of your trellis. The most common types of trellises include:
- A-Frame: This design resembles a triangle and is perfect for supporting vines that need to grow upward. The A-frame trellis is ideal for plants that require a sturdy structure, such as tomatoes or cucumbers.
- Ladder or Screen Trellis: A ladder-style trellis consists of horizontal rungs attached to two vertical supports. It’s great for small spaces and can support climbing plants like peas, beans, or morning glories.
- Arch Trellis: A beautifully curved arch trellis can serve as a dramatic focal point in your garden. It’s often used at entrances or to create a pathway for plants like roses or climbing vines to cascade down.
- Flat Panel Trellis: This trellis style is a simple, flat design that can be attached to walls, fences, or existing garden structures. It’s ideal for covering large areas with vines and can serve as a green screen or privacy barrier.
Consider the amount of space available, the types of plants you intend to grow, and how the trellis will fit into the overall design of your garden when choosing the type of structure to build.
3. Step-by-Step Construction
Once you’ve selected your materials and design, it’s time to start building. Below is a basic step-by-step guide for constructing a simple wooden A-frame trellis:
- Materials Needed: Two 6-foot wooden posts, four 4-foot horizontal wooden slats, screws, a drill, a saw, measuring tape, and a level.
- Step 1: Cut the two vertical posts to your desired height (usually around 6 feet). Cut the horizontal slats to the width of your design (typically 4 feet).
- Step 2: Attach two slats to the vertical posts using screws to create a sturdy base. Make sure the slats are evenly spaced and perpendicular to the posts.
- Step 3: Use the remaining two slats to create the top section of the A-frame. Position these slats across the vertical posts, forming the top of the triangle.
- Step 4: Secure all the joints with screws, ensuring the structure is stable.
- Step 5: Place the trellis in the desired location in your garden and anchor it to the ground if necessary.
You can then train your climbing plants to grow up the structure by gently guiding their stems towards the trellis and securing them with soft ties as they grow.
DIY trellis structures are a fantastic way to enhance your garden with vertical gardening solutions. Whether you’re looking to save space, add a touch of elegance, or improve plant health, building your own trellis can provide a functional and aesthetically pleasing solution. With the right materials, design, and a bit of effort, you can create a trellis that not only supports your climbing plants but also adds beauty and structure to your outdoor space. By incorporating DIY trellis structures into your garden, you can enjoy the benefits of vertical gardening and transform even the smallest of spaces into a lush, green paradise.
Compact Storage Coffee Tables: Stylish and Practical Living Room Solutions
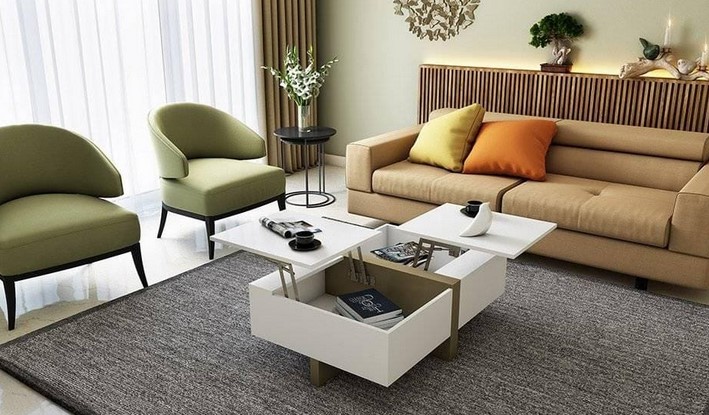
Source:https://media.designcafe.com
In the modern world of interior design, where both style and functionality are valued, compact storage coffee tables have become a staple in many living rooms. These versatile pieces of furniture offer more than just a surface for placing drinks or décor—they provide a clever storage solution for keeping the living area organized without sacrificing style. Whether you live in a small apartment or a spacious home, compact storage coffee tables can help you maximize your space while adding to the aesthetic of the room. In this article, we’ll explore the benefits of these multifunctional pieces, discuss key features to look for when choosing one, and share ideas for how to incorporate them into your home.
The Benefits of Compact Storage Coffee Tables
When it comes to furniture in the living room, the coffee table often serves as the centerpiece. However, traditional coffee tables are limited in their functionality—they offer little to no storage space and can quickly become cluttered with everyday items like remote controls, magazines, or even toys. Compact storage coffee tables solve this problem by offering hidden compartments, drawers, or lift-up tops that help organize and store items out of sight, keeping the room neat and tidy.
1. Space-Saving Design
The primary benefit of compact storage coffee tables is their ability to maximize limited space, making them ideal for small living rooms or apartments. Instead of using up valuable floor space with multiple storage units, a compact coffee table provides a centralized location to store everything from books to blankets without taking up additional space.
Some models feature a lift-top that reveals hidden storage compartments beneath the surface, which can be used for stowing away remote controls, chargers, or other small items. Others may include drawers or shelving, which makes them perfect for storing larger items like magazines, throw pillows, or even extra cushions. This integrated storage functionality allows homeowners to keep their living areas clutter-free, enhancing both the look and feel of the space.
2. Enhanced Organization
A compact storage coffee table doesn’t just provide space to hide things; it helps create an organized living room. Many of these tables come with multiple compartments or drawers, allowing for easy categorization of items. For instance, one drawer can be designated for media accessories such as remote controls, while another can hold kids’ toys, board games, or pet supplies. Some models even feature built-in trays or small baskets that can be used to keep everyday items like keys or phones in one place, making them easy to find when needed.
The added storage helps streamline the space and removes the need for cluttered side tables, baskets, or additional storage units. This is especially important in homes where the living room is the central area for socializing and entertainment—having a clutter-free surface ensures that the room remains visually appealing and organized, even in the midst of daily life.
3. Versatility in Style and Function
Compact storage coffee tables come in a wide variety of styles, materials, and finishes, making them suitable for almost any décor theme. From sleek modern designs to rustic, farmhouse-inspired tables, there is a storage coffee table to complement any living room aesthetic. The added benefit of these tables is that they don’t just look functional—they can serve as a focal point in the room.
For example, a chic, glass-topped storage table with metallic legs can elevate a contemporary living room, while a wooden table with vintage-style drawers may fit perfectly into a traditional or farmhouse-style space. Some tables even incorporate multifunctional features such as built-in stools or ottomans, allowing them to double as extra seating for guests.
Additionally, compact storage coffee tables are not limited to just coffee tables—they can also serve as footrests, additional work surfaces, or even side tables when placed next to a sofa. Their flexibility makes them ideal for families with diverse needs, where the living room is used for watching TV, hosting guests, or playing games.
Key Features to Look for in Compact Storage Coffee Tables
When shopping for a compact storage coffee table, there are several important features to consider that will ensure you choose the best option for your living space and needs.
1. Storage Capacity
The amount of storage space is one of the most crucial factors when selecting a compact storage coffee table. Depending on your needs, you may want a table with multiple drawers, a lift-top with hidden compartments, or an open shelving design. If you have more items to store, look for tables with larger or deeper storage areas. Conversely, if you’re looking for a more minimalist design, a table with just one or two drawers might be sufficient.
Additionally, consider how easy it is to access the storage. Lift-top tables, for example, offer the benefit of keeping items out of sight while still allowing you to access them easily when needed. Tables with open shelving might be more suitable for decor or items you use frequently, while closed storage is better for things that need to be kept out of sight.
2. Material and Durability
The material of your compact storage coffee table will play a significant role in both its longevity and its appearance. Wood is a classic choice for storage tables, offering durability and warmth, but it can also be heavier than other materials. For a more modern or industrial look, metal frames with wood or glass tops can add a contemporary edge while still offering functionality. Glass-topped tables provide an airy, sleek look, but they might require more frequent cleaning.
Consider the wear and tear that your coffee table will experience. If you have young children or pets, a durable wood or sturdy metal table may be more resilient to scratches, spills, and rough use. On the other hand, if the table will be more of a decorative piece in a low-traffic area, lighter materials such as MDF or particleboard might be sufficient.
3. Design and Aesthetic
When selecting a compact storage coffee table, it’s essential to choose one that complements the overall design of your living room. For instance, if your living room is modern, a minimalist coffee table with clean lines and subtle storage features may be a good fit. For a more traditional setting, opt for a coffee table that incorporates rich wood tones and classic design elements, such as carved legs or detailed hardware.
The finish of the table also plays an important role in its appearance. Darker finishes such as walnut or mahogany work well in formal, classic settings, while lighter finishes like oak or ash can brighten up a room and provide a more relaxed, casual feel. Neutral colors such as black, white, or gray can easily blend into any style, while bold colors or patterns can create a statement piece in the room.
How to Incorporate Compact Storage Coffee Tables into Your Living Room
Once you’ve chosen the perfect compact storage coffee table, it’s time to think about how to incorporate it into your living room. Here are a few tips for making the most of this versatile piece of furniture:
- Place it at the Center: As a focal point of the living room, the coffee table should be positioned in the center of the seating area. This ensures that it’s functional and accessible, providing easy access for everyone to use.
- Use the Storage Wisely: Be strategic with what you store inside the table. Keep items that you use often (like remotes or chargers) in the easy-to-reach compartments, while stowing away seasonal items or larger objects (like extra blankets or cushions) in deeper or less accessible areas.
- Add Decorative Touches: While the storage function of the coffee table is important, don’t forget about its role in your room’s décor. Add decorative elements like a vase, tray, or stack of books to make the table feel both functional and stylish.
- Mix with Other Furniture: Pair the coffee table with complementary furniture, such as a matching side table or ottoman, to create a cohesive and inviting space.
Compact storage coffee tables are a fantastic solution for anyone looking to enhance the functionality and style of their living room. By combining storage with aesthetic appeal, these tables allow you to keep your space organized while adding a design element that ties the room together. Whether you’re looking for a way to store extra blankets, toys, or media accessories, a well-chosen coffee table can serve as both a practical and stylish addition to your home. With their versatility in design and storage capacity, compact storage coffee tables prove that even the most practical furniture pieces can enhance the beauty and organization of your living space.
Smart Thermostats for Homes: Comfort and Efficiency

Source:https://callturneron.com
In today’s world, technology has made its way into almost every aspect of home living, and home automation systems are becoming more popular than ever before. Among the most impactful innovations is the introduction of smart thermostats for homes, which offer a convenient and energy-efficient way to control the climate in your living spaces. These devices not only allow you to regulate the temperature at the touch of a button but also come with features that learn your preferences, reduce energy consumption, and help you save on heating and cooling costs. In this article, we’ll explore how smart thermostats for homes work, their benefits, and why they are a great investment for any homeowner.
How Smart Thermostats Work
At their core, smart thermostats are designed to control your home’s heating and cooling systems more effectively and efficiently than traditional models. These thermostats connect to your Wi-Fi network, allowing you to adjust settings remotely via an app on your smartphone, tablet, or even voice assistants like Amazon Alexa or Google Assistant. Many models are equipped with sensors that detect when you’re at home or away, adjusting the temperature automatically based on your habits.
Smart thermostats also have the ability to learn from your routines. Over time, they analyze your temperature preferences and daily schedule to make automatic adjustments that enhance comfort while minimizing energy consumption. For example, the thermostat may automatically lower the temperature when you leave the house and raise it before you return, ensuring that your home is always at the optimal temperature without wasting energy.
Additionally, some smart thermostats come with features like geofencing, where the device uses your smartphone’s location to detect when you’re near or far from home and adjusts the temperature accordingly. This level of automation and adaptability is what sets smart thermostats apart from conventional models.
Benefits of Smart Thermostats for Homes
The shift towards smart thermostats for homes offers a variety of advantages, from improving energy efficiency to enhancing overall comfort. Let’s take a closer look at some of the key benefits:
1. Energy Savings and Efficiency
One of the most significant advantages of smart thermostats is their ability to reduce energy consumption. Traditional thermostats often require manual adjustments, and it’s easy to forget to turn the heat down when leaving the house for extended periods. With smart thermostats, the system can automatically adjust the temperature when you’re not home, ensuring that energy is not wasted on heating or cooling an empty house.
Studies have shown that homeowners can save as much as 10-15% on their annual energy bills by using a smart thermostat. Features like adaptive scheduling and geofencing ensure that your home’s heating and cooling systems are only running when needed, reducing the overall demand on energy.
2. Increased Comfort
Smart thermostats provide a level of convenience and comfort that traditional thermostats simply cannot match. By learning your preferred temperature settings and daily schedule, a smart thermostat can adjust the temperature to your exact specifications without requiring any input from you.
For instance, the thermostat can warm up the house just before you wake up or cool it down while you’re heading home from work. The ability to control the temperature remotely through a smartphone app means you can ensure a comfortable home environment, no matter where you are. This kind of control enhances the quality of life, allowing you to relax in an environment tailored to your preferences.
3. Remote Control and Monitoring
With a smart thermostat, you gain the ability to control and monitor your home’s temperature from virtually anywhere. Whether you’re at work, on vacation, or simply sitting on your couch, you can adjust your home’s climate at the touch of a button. The ability to remotely control your thermostat is particularly useful for homeowners who travel frequently or those who have varying schedules.
In addition, smart thermostats can provide detailed energy reports and insights. These reports can help you track how much energy you’re using and offer recommendations for improving efficiency. This level of transparency allows homeowners to make informed decisions about how to adjust their energy usage, leading to both financial and environmental benefits.
4. Integration with Other Smart Home Devices
Many smart thermostats integrate seamlessly with other smart home devices, creating a cohesive home automation system. For example, smart thermostats can work in conjunction with smart lighting, security systems, and even voice-controlled assistants like Amazon Echo or Google Home. By combining your smart thermostat with other connected devices, you can create an automated environment that not only enhances comfort but also boosts energy efficiency.
For example, your thermostat could work with a smart lighting system to adjust the temperature and lights based on your location or time of day. This integration streamlines home management and makes your home smarter and more efficient.
Choosing the Right Smart Thermostat for Your Home
When selecting a smart thermostat for your home, it’s essential to consider several factors to ensure you’re making the best choice for your needs:
- Compatibility: Check if the thermostat is compatible with your heating and cooling system. Some models are designed specifically for central heating, while others can work with zoned systems or heat pumps.
- Wi-Fi Connectivity: Ensure the thermostat can connect to your Wi-Fi network for remote control and monitoring. Most modern smart thermostats have Wi-Fi connectivity, but it’s important to check that your home’s network can support the device.
- User Interface: Look for a thermostat that has an easy-to-use interface, whether it’s through a mobile app or a touchscreen display. The user experience should be intuitive and straightforward.
- Additional Features: Some smart thermostats come with advanced features like geofencing, voice control, and energy reports. Consider what features are most important for your lifestyle and energy-saving goals.
In conclusion, smart thermostats for homes are an excellent way to enhance both comfort and efficiency in any household. These devices offer personalized climate control, which can lead to significant savings on energy bills while keeping your home at the perfect temperature. From learning your routines to integrating with other smart devices, smart thermostats provide a level of convenience and automation that traditional thermostats simply cannot match. Whether you’re looking to save on energy costs, improve comfort, or embrace the future of home automation, a smart thermostat is a valuable investment that brings long-term benefits. By upgrading to a smart thermostat, you can enjoy a smarter, more comfortable, and more energy-efficient home.
Custom Window Treatments to Elevate Your Interiors

Source:https://images.squarespace-cdn.com
When it comes to designing a home that is both functional and stylish, custom window treatments are an often-overlooked element that can make a significant impact. The right window treatments do more than just provide privacy or block out sunlight; they have the power to enhance the overall aesthetic of a room, complement your interior décor, and create a more comfortable environment. Custom window treatments offer a tailored solution that perfectly fits your windows, style preferences, and functional needs. In this article, we will explore the benefits of custom window treatments, the different types available, and how they can elevate your interiors.
The Benefits of Custom Window Treatments
There are several reasons why homeowners choose custom window treatments over ready-made options. While off-the-shelf curtains or blinds may seem like a convenient and inexpensive option, custom treatments offer a range of benefits that can enhance the look and feel of your home. From personalized designs to better functionality, custom window treatments are an investment in both style and practicality.
1. Perfect Fit for Every Window
One of the most significant advantages of custom window treatments is the precise fit they offer. Every window is different, and choosing off-the-shelf window coverings can often result in a poor fit that leaves gaps or requires awkward adjustments. Custom window treatments are made to the exact measurements of your windows, ensuring a seamless and polished appearance.
- Tailored Fit: No matter the size or shape of your windows—whether they are extra-large, unusually shaped, or hard to cover—custom treatments ensure that your windows are dressed perfectly.
- Aesthetic Precision: Custom designs help create a uniform, clean, and high-end look, enhancing the overall aesthetic of the room. Whether you want floor-to-ceiling drapes or perfectly measured blinds, custom window treatments help achieve a polished look.
2. Enhanced Privacy and Light Control
Custom window treatments offer better control over the amount of light entering a room and provide superior privacy. With custom blinds, shades, or curtains, you can choose the ideal material, opacity, and design that suits your needs.
- Light Filtering: Whether you’re looking for sheer curtains that allow natural light to filter through or blackout shades for total darkness, custom treatments allow you to select exactly how much light enters a room.
- Privacy Options: For areas that require additional privacy, such as bedrooms or bathrooms, custom window treatments can be designed to block outside views while still allowing light to enter, offering both privacy and functionality.
3. Endless Design Possibilities
Custom window treatments are incredibly versatile and allow you to express your personal style. With a wide variety of fabrics, colors, patterns, and materials to choose from, you can create a look that perfectly complements your interior design theme.
- Wide Range of Materials: From luxurious silk drapes to functional wooden blinds, custom treatments are available in a wide range of materials to suit any design scheme.
- Fabric and Color Choices: Whether you prefer bold, vibrant patterns or understated neutral tones, the ability to choose your own fabric and colors ensures that your window treatments seamlessly match your décor.
- Design Customization: In addition to materials and colors, you can customize the details of your window treatments. From pleated drapes to Roman shades, and from motorized blinds to decorative valances, custom window treatments can be tailored to suit both aesthetic and functional preferences.
Types of Custom Window Treatments
The options for custom window treatments are vast, each offering unique benefits depending on your style and needs. Below, we’ll break down some of the most popular types of custom window treatments to help you find the right fit for your space.
1. Custom Blinds
Blinds are one of the most versatile and functional window treatment options. Custom blinds can be made from various materials, including wood, faux wood, aluminum, and fabric. The slats of the blinds can be adjusted to control light, and they can be designed to fit any window size or shape.
- Wooden Blinds: Offer a warm, natural look and are perfect for traditional or rustic interiors.
- Faux Wood Blinds: Provide the same aesthetic as wooden blinds but are more resistant to moisture, making them ideal for kitchens and bathrooms.
- Vertical Blinds: These are commonly used for larger windows, such as sliding glass doors, and can be customized for height and width.
2. Custom Shades
Shades offer a more streamlined look compared to blinds and are available in a variety of styles, such as Roman shades, roller shades, and honeycomb shades. Custom shades can be designed to fit the exact dimensions of your windows and provide excellent light control and insulation.
- Roman Shades: Known for their elegant folds, these shades can be crafted in luxurious fabrics for a soft, sophisticated look.
- Honeycomb Shades: These shades are designed with air pockets that help improve energy efficiency by providing insulation, making them ideal for colder climates.
- Roller Shades: A minimalist and functional option, roller shades are made from a single piece of fabric that can be customized with various textures and patterns.
3. Custom Drapes and Curtains
Custom drapes and curtains are timeless window treatments that offer a classic, elegant look. Available in a range of fabrics, from luxurious silks to durable linens, these window treatments add both style and functionality to your home.
- Drapes: Custom drapes are typically made from heavier fabrics and can be lined for additional light control and insulation. They are perfect for formal living rooms or bedrooms where privacy and ambiance are important.
- Sheer Curtains: If you’re looking for a more delicate, airy look, sheer curtains allow natural light to filter in while still offering privacy.
4. Custom Shutters
Shutters are a durable and stylish option that adds a touch of sophistication to any room. Available in materials such as wood, vinyl, and composite, custom shutters can be tailored to fit windows of any size or shape.
- Plantation Shutters: These feature wide slats and are a popular choice for both traditional and modern homes.
- Café Shutters: These cover only the lower half of a window, providing privacy while still allowing light into the room.
In conclusion, custom window treatments are a fantastic way to elevate your home’s interiors. With their tailored fit, aesthetic versatility, and functional benefits, they can completely transform a space. Whether you’re looking for added privacy, better light control, or a way to make a bold design statement, custom window treatments offer a solution that fits your unique needs. From blinds and shades to drapes and shutters, the possibilities are endless. By investing in custom window treatments, you not only enhance the beauty of your home but also improve its energy efficiency and comfort. Ultimately, custom window treatments are a timeless and practical addition that adds value, style, and functionality to any room.
Energy-Efficient Roofing Options for Your Home

Source:https://roof-troopers.com
When it comes to maintaining a comfortable and cost-effective home, energy-efficient roofing plays a crucial role. With the rising concern about environmental sustainability and increasing energy costs, more homeowners are turning to energy-efficient roofing options to improve the performance of their homes. These roofing systems are designed to reduce energy consumption, enhance insulation, and create a more comfortable living environment. In this article, we will explore various energy-efficient roofing materials and strategies that can help you save on energy bills while contributing to a more sustainable future.
Why Choose Energy-Efficient Roofing?
Choosing energy-efficient roofing is an investment that pays off in both the short and long term. Traditional roofing materials can absorb heat, which makes your air conditioning system work harder during the hot months, resulting in higher energy bills. On the other hand, energy-efficient roofing systems reflect sunlight, keep homes cooler in the summer, and provide better insulation during the winter. These benefits not only reduce your overall energy consumption but also improve the longevity of your roof and home.
Additionally, many energy-efficient roofing materials are environmentally friendly, helping homeowners reduce their carbon footprint. With the growing trend towards sustainability, energy-efficient roofing options are becoming increasingly popular for those looking to make eco-conscious choices without compromising on aesthetics or functionality.
Popular Energy-Efficient Roofing Materials
There are several roofing materials available that can help reduce your home’s energy consumption. Each option offers its own set of benefits depending on your climate, budget, and design preferences. Let’s take a closer look at some of the most popular energy-efficient roofing materials.
1. Cool Roofing (Reflective Roofing)
Cool roofing is one of the most effective energy-efficient roofing options for homes in warm climates. This type of roofing reflects more sunlight and absorbs less heat than traditional roofing materials. Cool roofing materials are typically made from reflective coatings, such as white, silver, or light-colored shingles, tiles, or membranes. These roofs help reduce the urban heat island effect, where cities are hotter than surrounding rural areas due to the abundance of heat-absorbing materials like asphalt and concrete.
- Benefits:
- Reduces cooling costs by reflecting solar heat away from the building.
- Keeps the interior of your home cooler, improving comfort during hot months.
- Extends the lifespan of your roof by reducing thermal expansion and contraction.
- Ideal For: Homes in hot climates or areas with long summers where cooling costs are a concern.
2. Metal Roofing
Metal roofing is another popular energy-efficient option due to its reflective properties and durability. Unlike traditional asphalt shingles, metal roofs reflect more sunlight, keeping your home cooler in the summer. They also have excellent insulation properties, preventing heat loss in the winter.
- Benefits:
- Long-lasting, with a lifespan of 40 to 70 years.
- Highly reflective, helping to lower energy costs.
- Available in various styles, including standing seam and metal tiles, allowing homeowners to choose a look that suits their home’s aesthetic.
- Ideal For: Homeowners who are looking for a long-lasting, energy-efficient roofing option that also provides excellent insulation.
3. Solar Roofs
A solar roof combines the advantages of traditional roofing with solar panel technology. Solar roofing systems are designed to convert sunlight into electricity, which can be used to power your home. These roofs are composed of solar shingles or panels that are integrated into the roof structure, providing both energy generation and protection from the elements.
- Benefits:
- Reduces electricity bills by generating your own energy.
- Can qualify for tax incentives and rebates in many regions.
- Provides a clean, renewable energy source for your home.
- Ideal For: Homeowners looking for a long-term solution that generates electricity while reducing energy consumption.
4. Clay and Concrete Tiles
Clay and concrete tiles are known for their excellent insulation properties. These materials are naturally energy-efficient, as they absorb less heat than other roofing materials, like asphalt shingles. Additionally, they are highly durable and resistant to extreme weather conditions, making them a smart choice for homes in areas prone to heat or storms.
- Benefits:
- Exceptional insulation properties that keep your home cool in summer and warm in winter.
- Durable and resistant to fire, storms, and hail.
- Available in various colors and styles to suit different architectural designs.
- Ideal For: Homes in hot climates or areas with high humidity, where insulation and durability are key.
Additional Ways to Improve Roofing Efficiency
While selecting energy-efficient roofing materials is a great starting point, there are additional ways to enhance the overall performance of your roof and reduce energy consumption.
1. Proper Insulation and Ventilation
Proper insulation and ventilation are key factors in maintaining an energy-efficient roof. Even the most energy-efficient roofing materials will not perform at their best if your attic or roof space is not well-insulated. Adequate insulation prevents heat from escaping during the winter and reduces the amount of heat that enters your home in the summer. Ventilation also helps to regulate the temperature of the roof and attic, preventing excess heat buildup and moisture damage.
- Benefits:
- Helps to maintain a stable indoor temperature year-round.
- Reduces energy consumption by reducing the reliance on heating and cooling systems.
- Prevents moisture buildup, which can lead to mold and mildew.
2. Green Roofs
A green roof, or living roof, is another option for homeowners interested in sustainability and energy efficiency. These roofs are covered with vegetation, which provides natural insulation and reduces the heat absorbed by the building. Green roofs also improve air quality and provide a habitat for wildlife, making them an eco-friendly option for environmentally conscious homeowners.
- Benefits:
- Reduces energy consumption by providing natural insulation.
- Absorbs rainwater, reducing runoff and improving water management.
- Improves air quality and enhances the aesthetic appeal of your home.
- Ideal For: Homeowners who live in urban areas and want to add greenery to their roofs while benefiting from energy efficiency.
In conclusion, energy-efficient roofing offers a wide range of options for homeowners looking to reduce their energy bills, increase comfort, and contribute to environmental sustainability. Whether you opt for cool roofing, metal roofing, solar panels, or clay and concrete tiles, each material provides unique benefits that can enhance your home’s energy performance. Additionally, considering other factors like insulation, ventilation, and the possibility of a green roof can further improve your home’s overall energy efficiency.
As energy costs continue to rise and the demand for sustainable solutions grows, investing in an energy-efficient roof is one of the most effective ways to improve your home’s performance. By selecting the right roofing material for your climate and needs, you can enjoy long-term savings, comfort, and peace of mind knowing that you’re making an environmentally responsible choice.